My Lab Setup for Azure Databricks practice
Azure Databricks is a Microsoft Azure-based version of the popular open-source Databricks platform. Similarly to Azure Synapse Analytics, an Azure Databricks workspace provides a central point for managing Databricks clusters, data, and resources on Azure.
Step 1. Signup for Azure Free trial
Link: https://azure.microsoft.com/en-in/free
Step 2. Sign in to the Azure portal
Link: https://portal.azure.com
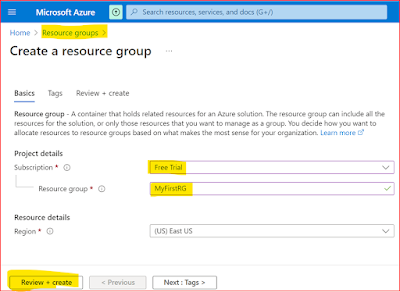
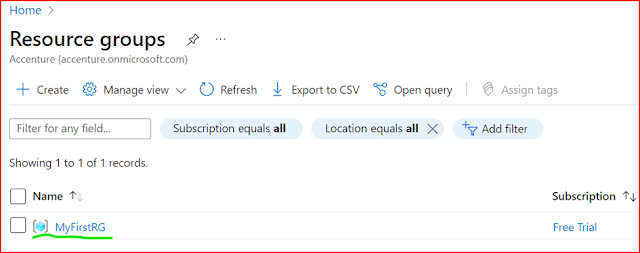
Step 3. Create Azure Resource Group
Step 4. Open Cloud Shell in Azure Portal
Use the [>_] button to the right of the search bar at the top of the page to create a new Cloud Shell in the Azure portal, selecting a PowerShell environment and creating storage if prompted. The cloud shell provides a command line interface in a pane at the bottom of the Azure portal, as shown here:
We will get the option to select a subscription, create/ use a resource group, storage account, file share
Let us create using Cloudshell, though we can create from GUI as well without much hustle.
- rm -r mslearn-databricks -f
- git clone https://github.com/MicrosoftLearning/mslearn-databricks
After the repo has been cloned, enter the following command to run the setup.ps1 script, which provisions an Azure Databricks workspace in an available region:
- ./mslearn-databricks/setup.ps1
I have tried executing the setup.ps1 file in the folder "mslearn-databricks" but no luck. I got a warning Insufficient resources
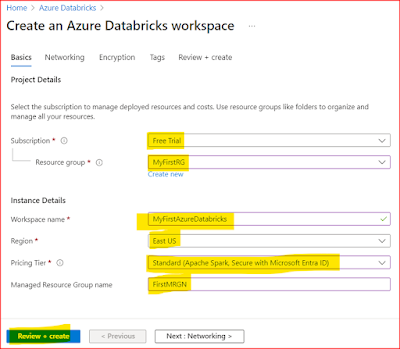
Step 6. Create Azure Databricks Service
This step would not have been required if setup.ps1 in the previous step had been successful.
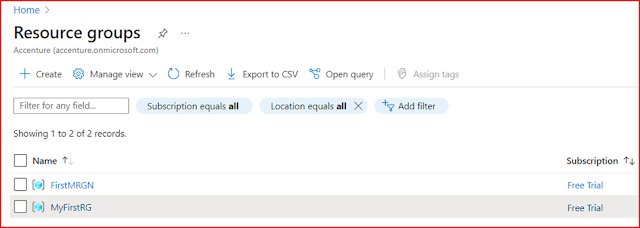
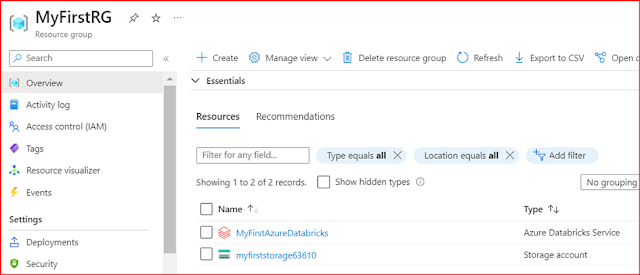
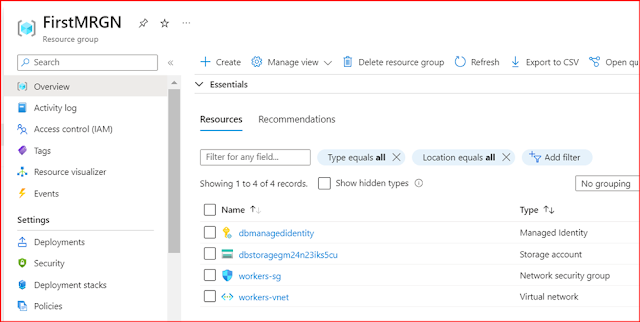
I can see Azure Dataribcks service is created along the managed resource group name required for Azure Databricks.
Step 7. Launch Azure Databricks
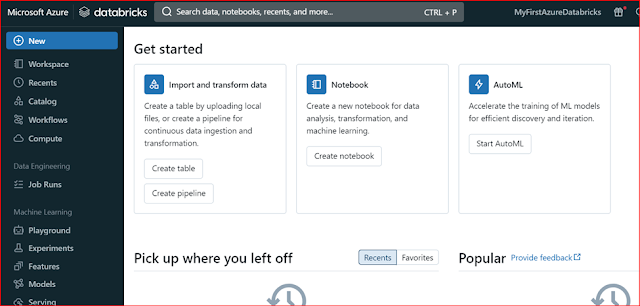
We will search Azure data bricks in the resource list and click the "Launch Workspace button"
Step 8. Create Cluster in Azure DataBricks
Azure Databricks is a distributed processing platform that uses Apache Spark clusters to process data in parallel on multiple nodes. Each cluster consists of a driver node to coordinate the work, and worker nodes to perform processing tasks. For practice, we’ll create a single-node cluster to minimize the compute resources used in the lab environment (in which resources may be constrained). In a production environment, we typically create a cluster with multiple worker nodes.
- In the sidebar on the left, select the (+) New task, and then select Cluster.
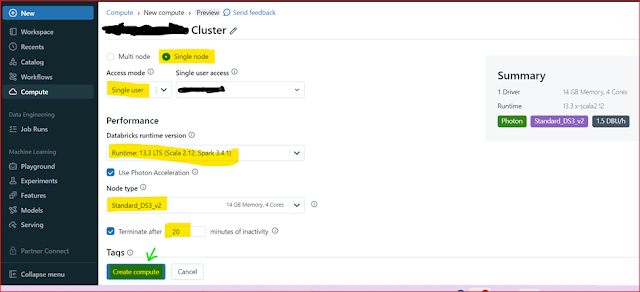
- In the New Cluster page, create a new cluster with the following settings:
- Cluster name: User Name’s cluster (the default cluster name)
- Policy: Unrestricted
- Cluster mode: Single Node
- Access mode: Single user (with your user account selected)
- Databricks runtime version: 13.3 LTS (Spark 3.4.1, Scala 2.12) or later
- Use Photon Acceleration: Selected
- Node type: Standard_DS3_v2
- Terminate after 20 minutes of inactivity
- Wait for the cluster to be created. It may take a minute or two.
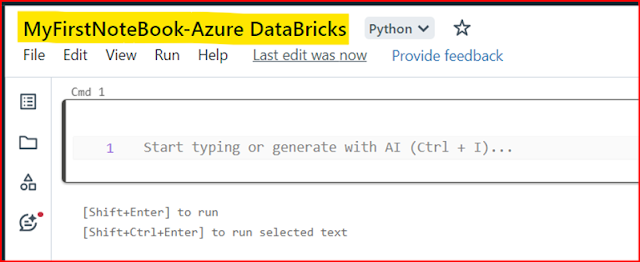
- In the sidebar, use the (+) New link to create a Notebook.
- Change the default notebook name (Untitled Notebook [date]) to a new name
- In the Connect drop-down list, select your cluster if it is not already selected. If the cluster is not running, it may take a minute or so to start.
Now you can practice all the code you want and practice for your interview at least for a month
Step Last. Cleanup Resources
- In the Azure Databricks portal, on the Compute page, select your cluster and select ■ Terminate to shut it down.
- If you’ve finished exploring Azure Databricks, you can delete the resources you’ve created to avoid unnecessary Azure costs and free up capacity in your subscription.


![Use the [>_] button to the right of the search bar at the top of the page to create a new Cloud Shell selecting a PowerShell environment and creating storage if prompted](https://blogger.googleusercontent.com/img/a/AVvXsEgvZ8OYD2Wfn7nXhXfDFeNkEyALFsXs_Olp75uJM27xI9r8C2qMeppKFEQCsIGpZW4scG0j0orcYBiekwVUPgFxtMq2nTHbMcrIBbcyvL_DOYgj1dh5W5s1U0gG7ThjnJ0N__-37lKRLn8KdNukSmyVM1C1vjKH_BTthxIt3jhykV3v0JFS4BvYSrpDkwE=w400-h244)





![In the sidebar, use the (+) New link to create a Notebook. Change the default notebook name (Untitled Notebook [date]) to a new name](https://blogger.googleusercontent.com/img/a/AVvXsEjJxTwCXeNsaSLbaY2vItxloVVQ4KpfS7m8R8tvcQ37nJLD8IA_zXKNj_oEatAAbdFkH4K1I8SWeWgetarpEC3Ddm9Ms11i8vxPO59LfBN6iOH597upVkP6WdmQCVqdsZEcSzZa1MEy2VO1WdPG0hFOp1KbTfqr8FnATNkb3wJXJLxeBAIWqsdC8XSqFA4=w400-h225)
glassagram
ReplyDeleteallsmo
instagram gizli hesap görme
revelio
bestwhozi
JO5KHİ